
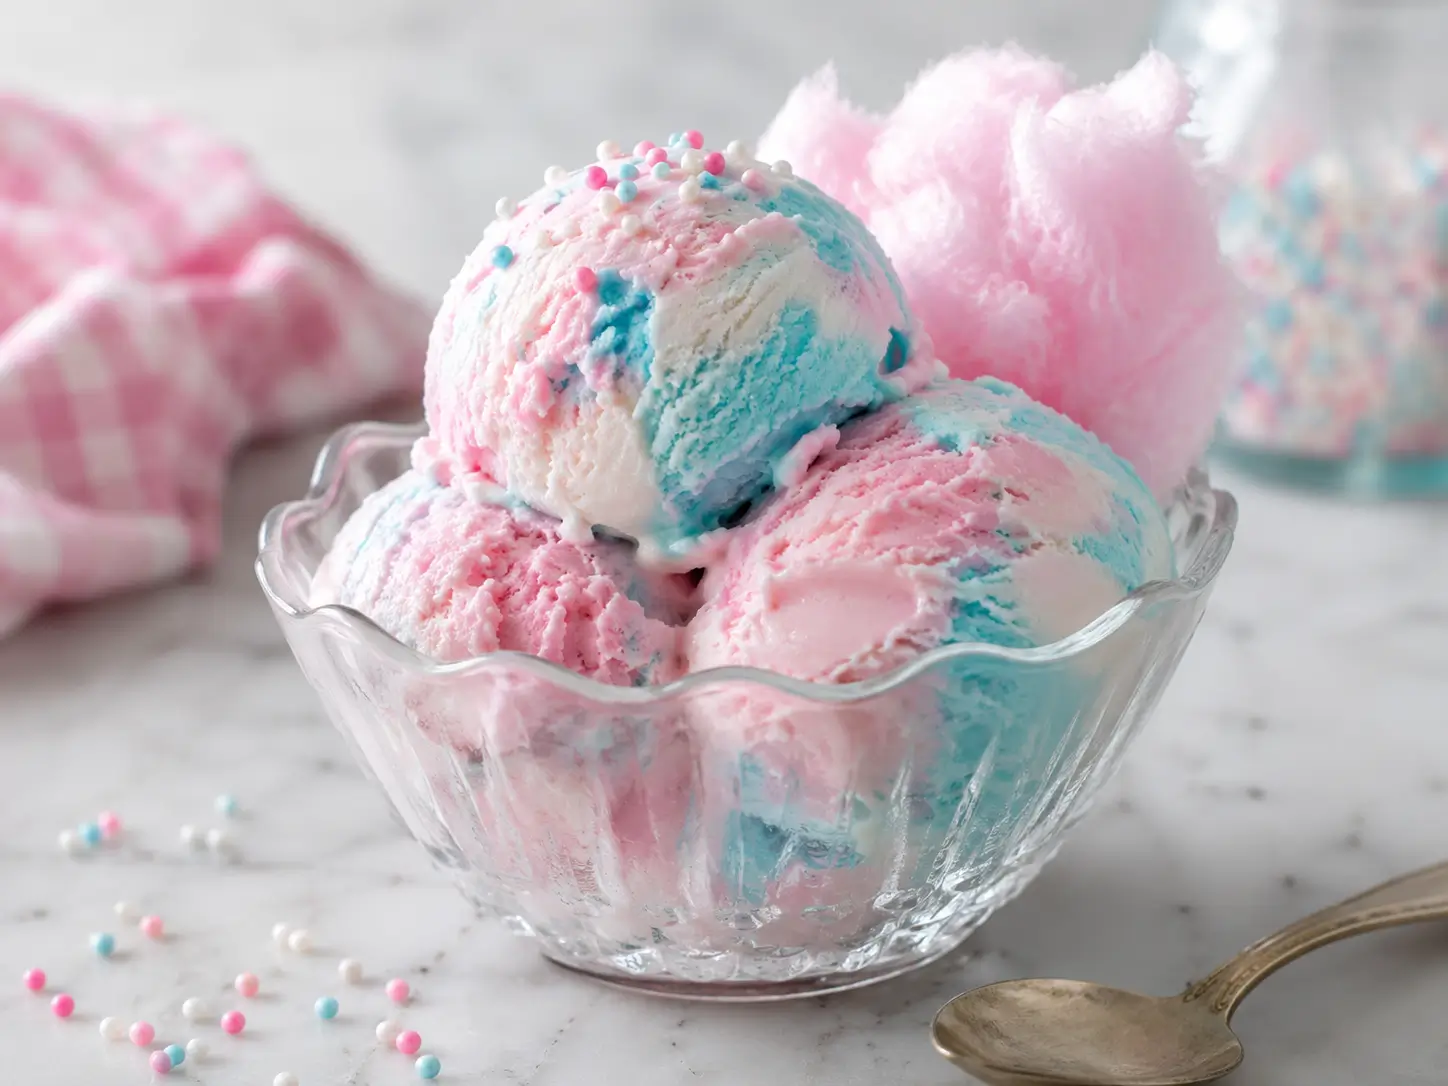
Cotton Candy Ice Cream is a creamy frozen dessert with a light carnival-style flavor and playful pink and blue swirls. It is made with a simple no-churn base, so you do not need an ice cream machine or any complicated cooking.
This colorful treat is a fun choice for birthday parties, summer gatherings, baby showers, or family dessert nights. It can be prepared ahead, stored in the freezer, and served in cones, bowls, milkshakes, or ice cream sandwiches.

Why You Will Love This Recipe
-
No ice cream machine needed: The mixture freezes into a creamy texture without churning.
-
Simple ingredients: The base uses heavy cream and sweetened condensed milk.
-
Fun appearance: Pink and blue swirls make every scoop look different.
-
Great for parties: It can be made several days ahead and served straight from the freezer.
Equipment Needed
-
Large mixing bowl
-
Medium mixing bowl
-
Electric hand mixer or stand mixer
-
Measuring cups and spoons
-
Rubber spatula
-
Two small bowls
-
Whisk
-
Loaf pan or freezer-safe container
-
Plastic wrap or airtight lid
-
Ice cream scoop
Ingredients List
For the Ice Cream Base
-
2 cups cold heavy whipping cream
-
1 can sweetened condensed milk, 14 ounces
-
1 1/2 teaspoons cotton candy baking emulsion or flavoring
-
1 teaspoon vanilla extract
-
1/8 teaspoon salt
For the Colors
-
Pink gel food coloring
-
Blue gel food coloring
Optional Mix-Ins and Toppings
-
1/3 cup pastel sprinkles
-
1/2 cup mini marshmallow bits
-
White chocolate chips
-
Crushed sugar cones
-
Fresh cotton candy, added only before serving
-
Whipped cream
Timing & Servings
- Prep Time: 20 minutes
- Freezing Time: 6 hours
- Total Time: 6 hours 20 minutes
- Servings: 10
How to Make Cotton Candy Ice Cream Step by Step
Step 1: Prepare the container
- Place a 9-by-5-inch loaf pan or another freezer-safe container in the freezer while you prepare the ice cream.
- A chilled container helps the mixture begin freezing sooner.
- Make sure there is enough space in the freezer for the container to sit flat.
Step 2: Mix the condensed milk base
- Pour the sweetened condensed milk into a medium bowl.
- Add the cotton candy flavoring, vanilla extract, and salt.
- Whisk until the ingredients are fully combined.
- Taste a small amount and check the flavoring strength. Cotton candy products vary by brand, so add only a small extra amount if needed.
Step 3: Whip the cream
- Pour the cold heavy cream into a large mixing bowl.
- Beat with an electric mixer on medium-high speed until stiff peaks form.
- The cream should hold its shape when the beaters are lifted, but it should still look smooth. Stop mixing before it becomes grainy.
Step 4: Combine the mixtures
- Add about one-third of the whipped cream to the condensed milk mixture.
- Fold gently with a rubber spatula to lighten the base.
- Add the remaining whipped cream in two portions, folding slowly until no large white streaks remain.
- Avoid stirring aggressively because the trapped air gives the ice cream its light texture.
Step 5: Divide and color the base
- Divide the ice cream mixture evenly between two bowls.
- Add a small amount of pink gel food coloring to one bowl and blue gel food coloring to the other.
- Fold each color gently until evenly blended.
- If using sprinkles, marshmallow bits, or white chocolate chips, divide them between the two mixtures and fold them in lightly.
Step 6: Layer and swirl
- Remove the chilled container from the freezer.
- Spoon alternating amounts of pink and blue ice cream into the container.
- Run a butter knife or skewer through the mixture two or three times to create soft swirls.
- Do not mix too much, or the colors may blend into purple.
- Smooth the top gently and add a few sprinkles if desired.
Step 7: Freeze and serve
- Press plastic wrap directly against the surface of the ice cream, then cover the container with a lid or another layer of wrap.
- Freeze for at least 6 hours, or preferably overnight, until firm.
- Let the ice cream sit at room temperature for 5 to 10 minutes before scooping.
- Top with whipped cream, sprinkles, crushed cones, or fresh cotton candy immediately before serving.

Tips for the Best Cotton Candy Ice Cream
Keep the cream very cold
Cold heavy cream whips faster and holds more air.
Keep it refrigerated until the moment you are ready to use it.
Chill the mixing bowl
For even better results, place the mixing bowl and beaters in the refrigerator for 15 minutes before whipping the cream.
This is especially helpful in a warm kitchen.
Use cotton candy baking flavoring
Cotton candy emulsion or baking flavoring gives the ice cream a reliable carnival-inspired taste.
Do not mix regular cotton candy into the base because it dissolves almost immediately.
Check the flavoring label
Some cotton candy oils are highly concentrated and require only a few drops.
Use the package directions when they differ from the amount listed in this recipe.
Use gel food coloring
Gel coloring creates bright pastel shades without adding excess liquid.
Start with a tiny amount and add more only if needed.
Fold gently
The whipped cream provides the air needed for a creamy texture.
Heavy stirring can deflate it and make the finished ice cream dense.
Do not overwhip the cream
Stop when stiff peaks form.
If the cream becomes grainy or starts separating, it has been whipped too far.
Avoid too many mix-ins
Large amounts of candy or sprinkles can make the ice cream harder to scoop.
Keep mix-ins small and limit the total amount to about 3/4 cup.
Cover the surface closely
Plastic wrap pressed directly against the ice cream reduces air exposure.
This helps limit ice crystals and freezer burn.
Let it soften before serving
No-churn ice cream can become quite firm after a long freeze.
A short rest at room temperature makes it easier to scoop.
Common Mistakes to Avoid
- Do not use warm or room-temperature cream.
- Avoid pouring liquid food coloring into the mixture when gel coloring is available.
- Do not stir the whipped cream into the condensed milk too quickly.
- Avoid mixing the pink and blue portions until the colors fully blend.
- Do not add fresh cotton candy before freezing.
- Avoid leaving the container uncovered in the freezer.
- Do not place the ice cream near strongly scented frozen foods, as it may absorb odors.
Variations to Try
Cotton Candy Sprinkle Ice Cream
Fold 1/3 cup of pastel jimmies into the base.
Avoid nonpareils because their colors may bleed.
Cotton Candy Marshmallow Ice Cream
Add 1/2 cup of dehydrated mini marshmallow bits.
Regular mini marshmallows can become firm in the freezer, so dehydrated pieces work better.
White Chocolate Cotton Candy Ice Cream
Fold in 1/2 cup of mini white chocolate chips.
Smaller chips are easier to scoop after freezing.
Cotton Candy Birthday Cake Ice Cream
Add 1/2 teaspoon of cake batter flavoring and 1/3 cup of rainbow sprinkles.
Reduce the cotton candy flavoring slightly if the mixture becomes too strong.
Purple Cotton Candy Ice Cream
Use pink and purple gel coloring instead of pink and blue.
This combination works well for unicorn or fantasy-themed parties.
Cotton Candy Cookie Ice Cream
Fold in 1 cup of chopped cotton candy-flavored cookies or sugar cookies.
Add them shortly before transferring the mixture to the freezer container.
Cotton Candy Ice Cream Sandwiches
Scoop softened ice cream between two sugar cookies.
Wrap each sandwich individually and freeze until firm.
Dairy-Free Version
Use chilled coconut whipping cream and dairy-free sweetened condensed milk.
The finished ice cream will have a mild coconut flavor.
Chocolate Swirl Version
Drizzle a small amount of cooled chocolate sauce between the pink and blue layers.
Use a thin swirl so the chocolate does not overpower the cotton candy flavor.
Strawberry Cotton Candy Ice Cream
Fold 1/2 cup of finely chopped freeze-dried strawberries into the base.
Avoid fresh strawberries because they can release water and become icy.
Serving Suggestions
- Serve Cotton Candy Ice Cream in sugar cones, waffle cones, or small dessert bowls.
- Top each scoop with whipped cream, pastel sprinkles, marshmallow bits, or crushed sugar cones.
- For birthday parties, set up an ice cream bar with several toppings and let guests build their own sundaes.
- The ice cream also works well alongside sugar cookies, cupcakes, vanilla cake, or brownies.
- For milkshakes, blend two scoops with about 1/2 cup of milk until smooth.
- You can also use it to make ice cream floats with lemon-lime soda or cream soda.
- Fresh cotton candy makes a fun garnish, but add it only when serving because moisture from the ice cream causes it to dissolve quickly.
Make-Ahead, Storage, and Reheating
Make-Ahead
Cotton Candy Ice Cream is ideal for making ahead because it needs several hours to freeze.
Prepare it one day before serving for the best texture.
It can also be made up to one week in advance if stored properly.
Freezer Storage
Keep the ice cream in a shallow airtight container.
Press plastic wrap or parchment paper directly against the surface before adding the lid.
Store it in the coldest part of the freezer rather than in the door.
For the best texture and flavor, use it within 2 weeks.
Preventing Ice Crystals
Limit the amount of time the container stays open.
Return it to the freezer as soon as you finish serving.
A tight cover and minimal air exposure help keep the texture smooth.
Refreezing Melted Ice Cream
Do not refreeze ice cream that has completely melted or sat at room temperature for an extended period.
Repeated melting and freezing can create large ice crystals and may affect food safety.
Softening Before Serving
Remove the container from the freezer 5 to 10 minutes before scooping.
If the ice cream is still very firm, dip the scoop into warm water and dry it before each scoop.
Reheating
This recipe does not require reheating.
It should remain frozen until shortly before serving.
Nutritional Facts
- Calories: 310
- Fat: 21g
- Carbs: 29g
- Protein: 4g
- Sugar: 27g
- Sodium: 90mg

Cotton Candy Ice Cream
Equipment
- Large mixing bowl
- Medium mixing bowl
- Electric hand mixer or stand mixer
- Measuring Cups and Spoons
- Rubber spatula
- Two small bowls
- Whisk
- Loaf pan or freezer-safe container
- Plastic wrap or airtight lid
- Ice cream scoop
Ingredients
For the Ice Cream Base
- 2 cups cold heavy whipping cream
- 1 can sweetened condensed milk 14 ounces
- 1 1/2 teaspoons cotton candy baking emulsion or flavoring
- 1 teaspoon vanilla extract
- 1/8 teaspoon salt
For the Colors
- Pink gel food coloring
- Blue gel food coloring
Optional Mix-Ins and Toppings
- 1/3 cup pastel sprinkles
- 1/2 cup mini marshmallow bits
- White chocolate chips
- Crushed sugar cones
- Fresh cotton candy added only before serving
- Whipped cream
Instructions
Step 1: Prepare the container
- Place a 9-by-5-inch loaf pan or another freezer-safe container in the freezer while you prepare the ice cream.
- A chilled container helps the mixture begin freezing sooner.
- Make sure there is enough space in the freezer for the container to sit flat.
Step 2: Mix the condensed milk base
- Pour the sweetened condensed milk into a medium bowl.
- Add the cotton candy flavoring, vanilla extract, and salt.
- Whisk until the ingredients are fully combined.
- Taste a small amount and check the flavoring strength. Cotton candy products vary by brand, so add only a small extra amount if needed.
Step 3: Whip the cream
- Pour the cold heavy cream into a large mixing bowl.
- Beat with an electric mixer on medium-high speed until stiff peaks form.
- The cream should hold its shape when the beaters are lifted, but it should still look smooth. Stop mixing before it becomes grainy.
Step 4: Combine the mixtures
- Add about one-third of the whipped cream to the condensed milk mixture.
- Fold gently with a rubber spatula to lighten the base.
- Add the remaining whipped cream in two portions, folding slowly until no large white streaks remain.
- Avoid stirring aggressively because the trapped air gives the ice cream its light texture.
Step 5: Divide and color the base
- Divide the ice cream mixture evenly between two bowls.
- Add a small amount of pink gel food coloring to one bowl and blue gel food coloring to the other.
- Fold each color gently until evenly blended.
- If using sprinkles, marshmallow bits, or white chocolate chips, divide them between the two mixtures and fold them in lightly.
Step 6: Layer and swirl
- Remove the chilled container from the freezer.
- Spoon alternating amounts of pink and blue ice cream into the container.
- Run a butter knife or skewer through the mixture two or three times to create soft swirls.
- Do not mix too much, or the colors may blend into purple.
- Smooth the top gently and add a few sprinkles if desired.
Step 7: Freeze and serve
- Press plastic wrap directly against the surface of the ice cream, then cover the container with a lid or another layer of wrap.
- Freeze for at least 6 hours, or preferably overnight, until firm.
- Let the ice cream sit at room temperature for 5 to 10 minutes before scooping.
- Top with whipped cream, sprinkles, crushed cones, or fresh cotton candy immediately before serving.
FAQs
What gives Cotton Candy Ice Cream its flavor?
Cotton candy baking emulsion or flavoring creates the carnival-style taste. Regular cotton candy is best used only as a garnish.
Can I make this recipe in an ice cream machine?
Yes. Mix the condensed milk, flavoring, salt, and cream without whipping the cream first. Chill the mixture, then churn according to your machine’s instructions.
Why is my ice cream too hard?
No-churn ice cream becomes firmer during long freezer storage. Let it sit at room temperature for 5 to 10 minutes before scooping.
Can I add real cotton candy to the ice cream?
It is not recommended inside the mixture because it quickly dissolves. Add small pieces only immediately before serving.
Conclusion
Cotton Candy Ice Cream is a creamy no-churn dessert with a light carnival flavor and colorful pink and blue swirls. It requires no cooking or ice cream machine, making it manageable for beginners and easy to prepare ahead.