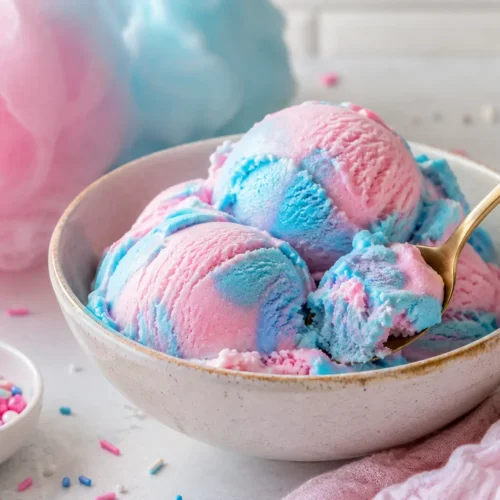
Cotton Candy Ice Cream
Cotton Candy Ice Cream is a creamy, homemade frozen dessert with the nostalgic flavor of classic carnival cotton candy and fun pastel swirls. This refreshing treat is perfect for summer parties, birthdays, or whenever you're craving a colorful and playful dessert.
Equipment
- Large mixing bowl
- Medium mixing bowl
- Electric hand mixer or stand mixer
- Measuring Cups and Spoons
- Rubber spatula
- Two small bowls
- Whisk
- Loaf pan or freezer-safe container
- Plastic wrap or airtight lid
- Ice cream scoop
Ingredients
For the Ice Cream Base
- 2 cups cold heavy whipping cream
- 1 can sweetened condensed milk 14 ounces
- 1 1/2 teaspoons cotton candy baking emulsion or flavoring
- 1 teaspoon vanilla extract
- 1/8 teaspoon salt
For the Colors
- Pink gel food coloring
- Blue gel food coloring
Optional Mix-Ins and Toppings
- 1/3 cup pastel sprinkles
- 1/2 cup mini marshmallow bits
- White chocolate chips
- Crushed sugar cones
- Fresh cotton candy added only before serving
- Whipped cream
Instructions
Step 1: Prepare the container
- Place a 9-by-5-inch loaf pan or another freezer-safe container in the freezer while you prepare the ice cream.
- A chilled container helps the mixture begin freezing sooner.
- Make sure there is enough space in the freezer for the container to sit flat.
Step 2: Mix the condensed milk base
- Pour the sweetened condensed milk into a medium bowl.
- Add the cotton candy flavoring, vanilla extract, and salt.
- Whisk until the ingredients are fully combined.
- Taste a small amount and check the flavoring strength. Cotton candy products vary by brand, so add only a small extra amount if needed.
Step 3: Whip the cream
- Pour the cold heavy cream into a large mixing bowl.
- Beat with an electric mixer on medium-high speed until stiff peaks form.
- The cream should hold its shape when the beaters are lifted, but it should still look smooth. Stop mixing before it becomes grainy.
Step 4: Combine the mixtures
- Add about one-third of the whipped cream to the condensed milk mixture.
- Fold gently with a rubber spatula to lighten the base.
- Add the remaining whipped cream in two portions, folding slowly until no large white streaks remain.
- Avoid stirring aggressively because the trapped air gives the ice cream its light texture.
Step 5: Divide and color the base
- Divide the ice cream mixture evenly between two bowls.
- Add a small amount of pink gel food coloring to one bowl and blue gel food coloring to the other.
- Fold each color gently until evenly blended.
- If using sprinkles, marshmallow bits, or white chocolate chips, divide them between the two mixtures and fold them in lightly.
Step 6: Layer and swirl
- Remove the chilled container from the freezer.
- Spoon alternating amounts of pink and blue ice cream into the container.
- Run a butter knife or skewer through the mixture two or three times to create soft swirls.
- Do not mix too much, or the colors may blend into purple.
- Smooth the top gently and add a few sprinkles if desired.
Step 7: Freeze and serve
- Press plastic wrap directly against the surface of the ice cream, then cover the container with a lid or another layer of wrap.
- Freeze for at least 6 hours, or preferably overnight, until firm.
- Let the ice cream sit at room temperature for 5 to 10 minutes before scooping.
- Top with whipped cream, sprinkles, crushed cones, or fresh cotton candy immediately before serving.