

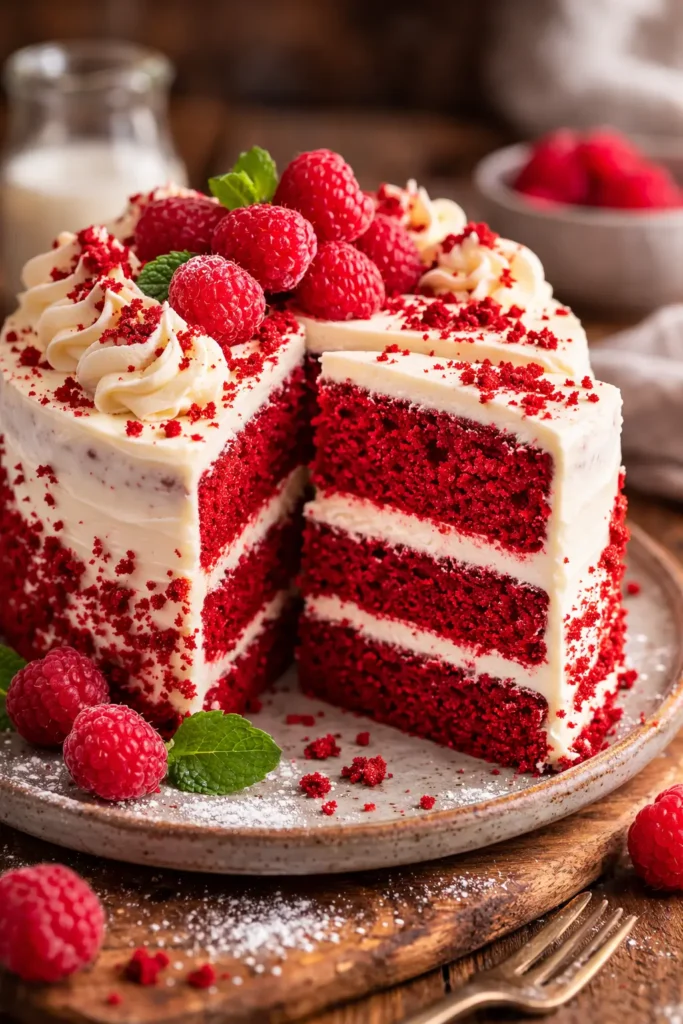
Red velvet cake has a way of feeling both classic and special at the same time. It is soft, velvety, lightly cocoa-flavored, and finished with a tangy cream cheese frosting that makes every bite rich without being too heavy. Whether you are baking for birthdays, holidays, Valentine’s Day, or simply because you want a beautiful homemade dessert, this cake always makes an impression.
What sets red velvet cake apart is its texture. A good one should be tender, moist, and fine-crumbed, with just enough cocoa to give it depth without turning it into a chocolate cake. The slight tang from buttermilk and vinegar is part of what gives red velvet its signature flavor. When paired with smooth cream cheese frosting, the balance is hard to beat.
I always think of red velvet cake as one of those recipes that looks bakery-worthy but is completely achievable at home when the method is right. A few small details make all the difference, from measuring flour correctly to avoiding overmixing the batter. Once you understand those steps, this becomes a dependable cake recipe you can come back to again and again.
Why You’ll Love This Red Velvet Cake
This recipe works because it focuses on both flavor and texture, not just color. It is designed to give you a cake that tastes as good as it looks.
Soft, moist crumb with a tender texture
Balanced flavor with light cocoa and mild tang
Classic cream cheese frosting
Great for birthdays, celebrations, and holiday baking
Easy enough for home bakers but impressive enough for guests
A lot of red velvet cakes look beautiful but taste bland. This version avoids that by building flavor through buttermilk, vanilla, cocoa, and a careful baking method.
Equipment
2 round 8-inch cake pans
Mixing bowls
Electric hand mixer or stand mixer
Whisk
Rubber spatula
Measuring cups and spoons
Sifter or fine mesh strainer
Cooling rack
Offset spatula or butter knife
Ingredients
For the Cake
2 1/2 cups all-purpose flour
1 1/2 cups granulated sugar
1 teaspoon baking soda
1 teaspoon salt
1 tablespoon unsweetened cocoa powder
1 1/2 cups vegetable oil
2 large eggs
1 cup buttermilk, room temperature
2 tablespoons red food coloring
1 teaspoon white vinegar
2 teaspoons vanilla extract
For the Cream Cheese Frosting
16 ounces cream cheese, softened
1/2 cup unsalted butter, softened
4 cups powdered sugar
2 teaspoons vanilla extract
Timing and Servings
Prep Time: 25 minutes
Cook Time: 30 minutes
Cooling and Frosting Time: 1 hour 15 minutes
Total Time: 2 hours 10 minutes
Servings: 12
How to Make Red Velvet Cake
Prepare the Pans and Oven
Preheat your oven to 350°F (175°C). Grease two 8-inch round cake pans, line the bottoms with parchment paper, and lightly grease the parchment as well. This step helps the cakes release cleanly after baking.
Mix the Dry Ingredients
In a medium bowl, whisk together the flour, sugar, baking soda, salt, and cocoa powder. This ensures the cocoa and leavening are evenly distributed throughout the batter.
Mix the Wet Ingredients
In a large bowl, whisk together the oil, eggs, buttermilk, red food coloring, vinegar, and vanilla extract until smooth. The mixture should be evenly colored with no streaks.
Combine Wet and Dry
Add the dry ingredients to the wet ingredients in two additions, mixing gently until just combined. Use a spatula or mixer on low speed. Do not overmix. Overworking the batter can make the cake dense instead of tender.
Divide the batter evenly between the prepared pans and smooth the tops.
Bake the Cakes
Bake for 28 to 32 minutes, or until a toothpick inserted into the center comes out with a few moist crumbs but no wet batter. Let the cakes cool in the pans for 10 to 15 minutes, then turn them out onto a wire rack to cool completely.
Trying to frost a warm cake is one of the quickest ways to ruin the finish, so let the layers cool fully before moving on.
How to Make Cream Cheese Frosting
In a large mixing bowl, beat the softened cream cheese and butter until smooth and creamy. Add the powdered sugar gradually, then mix in the vanilla extract. Beat until the frosting is fluffy and spreadable.
If the frosting feels too soft, chill it for 15 to 20 minutes before using. This makes layering and frosting much easier, especially in a warm kitchen.
Assemble the Cake
Place one cake layer on a serving plate or cake stand. Spread an even layer of cream cheese frosting over the top. Add the second cake layer and frost the top and sides.
For a neat finish, apply a thin crumb coat first, chill the cake for about 15 minutes, then add the final layer of frosting. This helps keep loose crumbs out of the finished frosting.
If you want a classic bakery-style look, reserve a few cake crumbs from leveling the layers and sprinkle them over the top or around the edges.
Tips for the Best Red Velvet Cake
Use Room Temperature Ingredients
Eggs, buttermilk, cream cheese, and butter blend more smoothly when they are not cold. This creates a more even batter and a better frosting texture.
Measure Flour Correctly
Too much flour is one of the most common reasons cakes turn out dry. Spoon the flour into the measuring cup and level it off instead of scooping directly from the bag.
Don’t Skip the Buttermilk and Vinegar
These ingredients are essential to the flavor and texture of a proper red velvet cake. They add tenderness and help create that subtle tang red velvet is known for.
Use a Good Quality Food Coloring
Red velvet should have a rich red appearance, not a dull brownish tone. Gel or concentrated liquid coloring often gives better results than weak food colorings.
Avoid Overbaking
Even a few extra minutes in the oven can dry out the cake. Start checking early and pull the layers out as soon as they are done.
What Does Red Velvet Cake Taste Like?
This is one of the most common questions, and it is worth clearing up. Red velvet cake is not simply chocolate cake dyed red. It has a much milder cocoa flavor, and the buttermilk and vinegar give it a slight tang that makes it taste distinct.
The overall flavor is smooth, lightly chocolatey, buttery, and subtly tangy. The cream cheese frosting is the perfect match because it adds richness and a little sharpness without overpowering the cake.
Easy Variations You Can Try
Red velvet cake is classic, but there is room to adapt it depending on the occasion.
Make Red Velvet Cupcakes
Use the same batter and divide it into cupcake liners. Bake at the same temperature, but start checking around 18 to 20 minutes.
Turn It Into a Sheet Cake
Pour the batter into a 9×13-inch pan for a simpler version that is easier to frost and transport.
Add Decorative Finishes
You can decorate with cake crumbs, white chocolate shavings, fresh berries, or piped frosting borders for a more polished presentation.
Make It for Holidays
This cake naturally suits Christmas and Valentine’s Day because of its rich red color, but it works all year round for birthdays and celebrations too.
Serving Suggestions
Red velvet cake is rich enough to stand on its own, but a few simple serving ideas can make it even better.
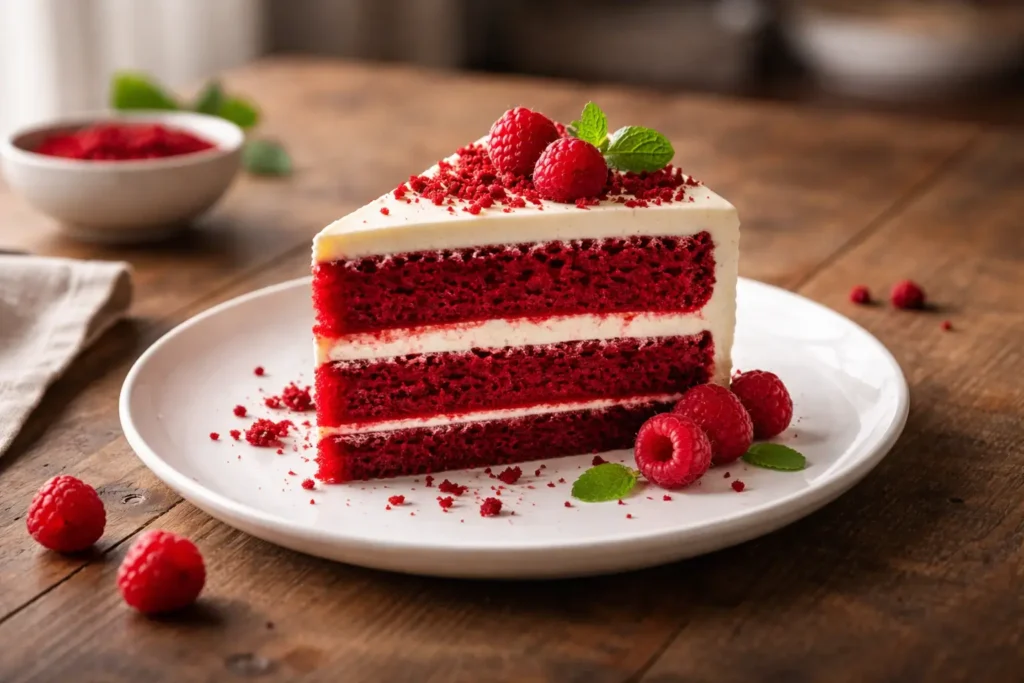
Serve chilled for a firmer frosting and cleaner slices
Let it sit at room temperature for 15 to 20 minutes before serving for the softest texture
Pair with coffee, tea, or a glass of cold milk
Top slices with a few fresh raspberries for a bright contrast
For parties, I prefer chilling the cake slightly before slicing. It gives cleaner layers and helps the frosting hold its shape beautifully.
Nutritional Facts
Calories: Approximately 520 per slice
Carbohydrates: 58g
Protein: 5g
Fat: 30g
Saturated Fat: 9g
Sugar: 42g
Sodium: 320mg
Storage Tips
Store red velvet cake covered in the refrigerator because of the cream cheese frosting. It will keep well for up to 4 days.
For the best texture, let slices sit at room temperature for 15 to 20 minutes before serving. You can also freeze unfrosted cake layers for up to 2 months if wrapped well. Thaw them overnight in the refrigerator before frosting.
Conclusion
A great red velvet cake should look beautiful, but more importantly, it should taste balanced, moist, and memorable. This recipe gives you all of that. The cake is soft and tender, the cocoa flavor stays subtle, and the cream cheese frosting adds the exact tangy finish that red velvet needs.
It is the kind of dessert that feels timeless because it delivers every time. Whether you are baking for a celebration or simply want a dependable homemade cake that feels a little extra special, red velvet cake remains one of the best choices. Once you make it from scratch with the right method, it is easy to see why it has stayed popular for generations.
FAQs
Why is red velvet cake different from chocolate cake?
Red velvet cake uses much less cocoa than chocolate cake and has a mild tang from buttermilk and vinegar, which gives it a distinct flavor and texture.
Can I make red velvet cake without buttermilk?
You can make a quick substitute by mixing 1 tablespoon of lemon juice or vinegar into 1 cup of milk and letting it sit for 5 minutes, but real buttermilk gives the best result.
What frosting goes best with red velvet cake?
Cream cheese frosting is the classic choice because its tangy flavor balances the sweetness and richness of the cake perfectly.
Can I make red velvet cake ahead of time?
Yes. You can bake the cake layers a day ahead, wrap them well, and frost the cake the next day.
Why did my red velvet cake turn out dry?
Dry cake usually comes from too much flour, overmixing, or overbaking. Accurate measuring and careful timing make a big difference.
Can I freeze red velvet cake?
Yes. You can freeze the unfrosted layers or even frosted slices. Wrap them well and store for up to 2 months.