
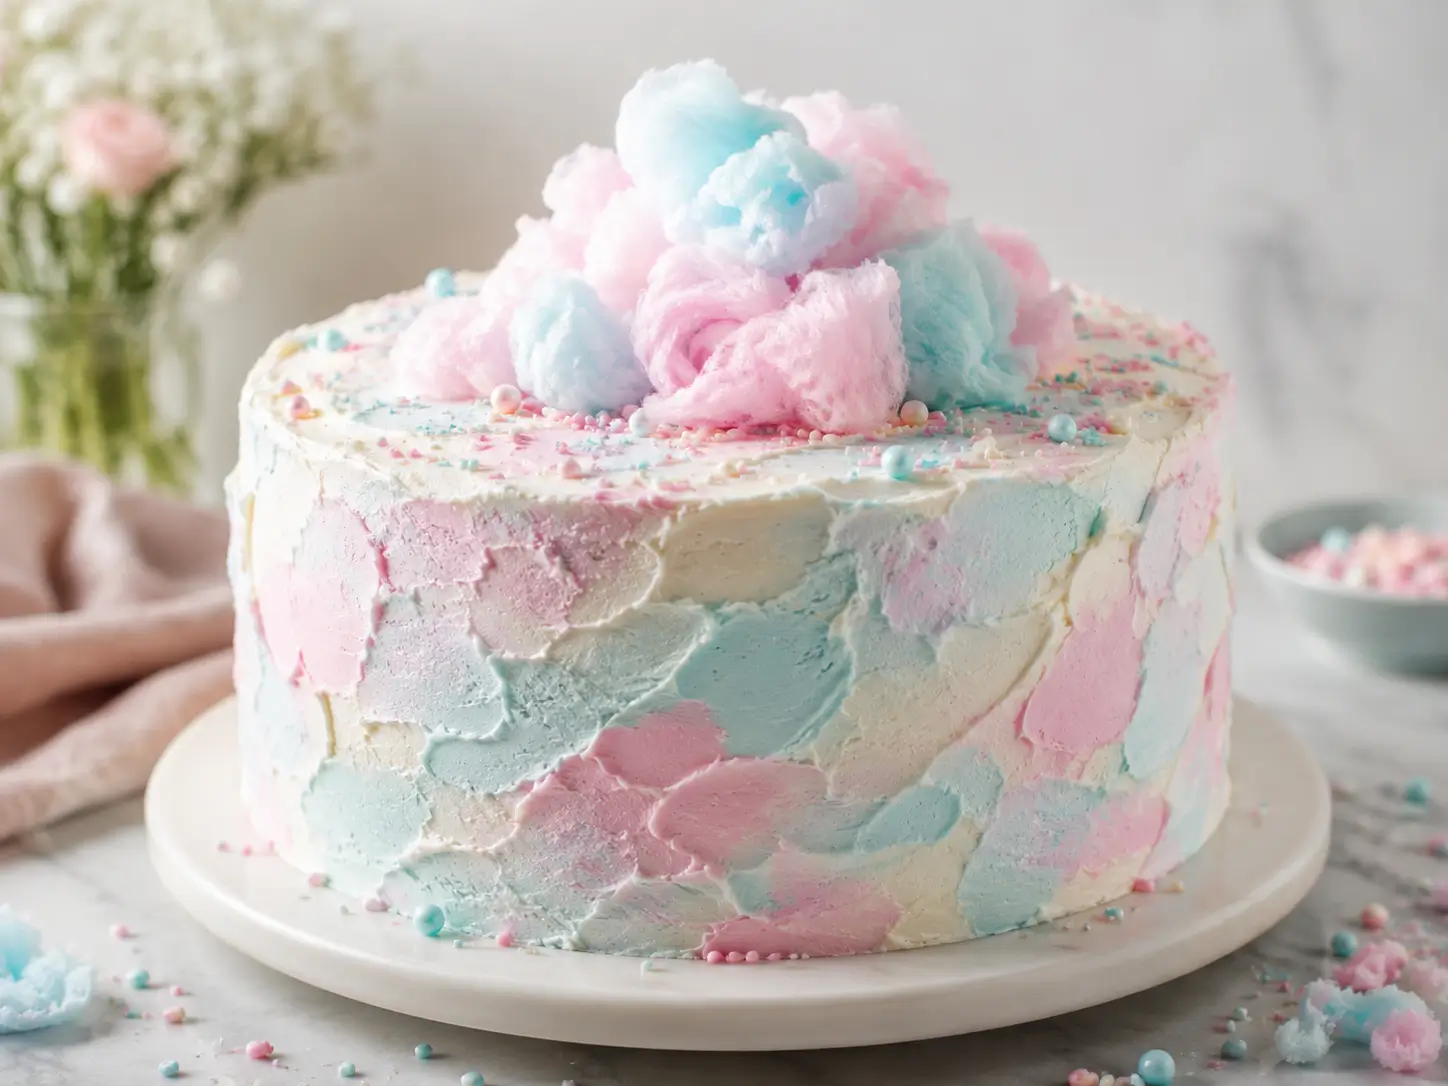
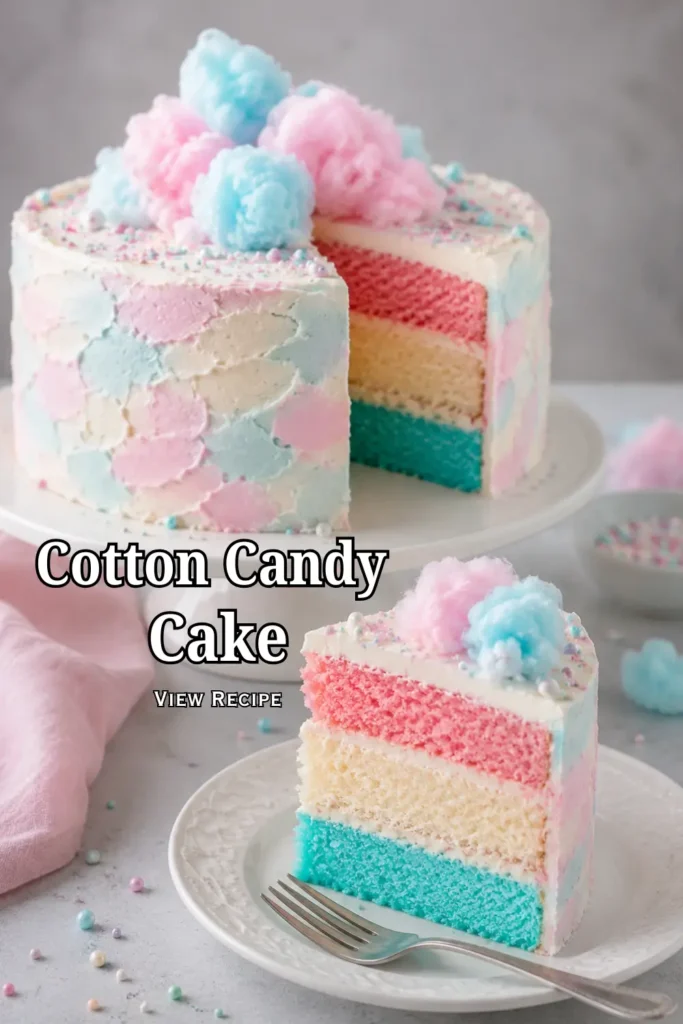
Cotton Candy Cake is a soft vanilla layer cake flavored with cotton candy baking emulsion and decorated with swirls of pink and blue buttercream. The pastel colors and light carnival-style flavor make it playful without making the baking process overly complicated.
This cake is a fun choice for birthdays, baby showers, carnival-themed parties, gender reveal celebrations, or colorful dessert tables. It can be prepared in advance, and the decorations can be kept simple or made more festive with sprinkles and fresh cotton candy.
Why You Will Love This Recipe
-
Fun presentation: Pink and blue cake layers create a bright party centerpiece.
-
Soft and moist: Buttermilk, butter, and oil help the cake stay tender.
-
Beginner-friendly: The recipe uses a simple layer-cake method with clear steps.
-
Easy to decorate: Swirled buttercream looks impressive without advanced piping skills.
Equipment Needed
-
Two 8-inch round cake pans
-
Parchment paper
-
Nonstick baking spray
-
Large mixing bowl
-
Medium mixing bowl
-
Electric hand mixer or stand mixer
-
Measuring cups and spoons
-
Whisk
-
Rubber spatula
-
Two small bowls
-
Wire cooling racks
-
Offset spatula or butter knife
-
Cake turntable, optional
-
Piping bag and large piping tip, optional
Ingredients List
For the Cotton Candy Cake
-
2 3/4 cups all-purpose flour
-
2 1/2 teaspoons baking powder
-
1/2 teaspoon baking soda
-
1/2 teaspoon salt
-
3/4 cup unsalted butter, softened
-
1/4 cup vegetable or canola oil
-
1 3/4 cups granulated sugar
-
4 large eggs, at room temperature
-
2 teaspoons cotton candy baking emulsion or flavoring
-
1 teaspoon vanilla extract
-
1 cup buttermilk, at room temperature
-
Pink gel food coloring
-
Blue gel food coloring
For the Cotton Candy Buttercream
-
1 1/2 cups unsalted butter, softened
-
5 cups powdered sugar, sifted if lumpy
-
3 to 5 tablespoons heavy cream or whole milk
-
1 teaspoon cotton candy baking emulsion
-
1/2 teaspoon vanilla extract
-
1/4 teaspoon salt
-
Pink gel food coloring
-
Blue gel food coloring
Optional Decorations
-
Pink, blue, and white sprinkles
-
Edible glitter
-
White chocolate curls
-
Fresh cotton candy
-
Pastel sanding sugar
-
Small candy pieces
Timing & Servings
- Prep Time: 35 minutes
- Cook Time: 28 minutes
- Cooling and Decorating Time: 1 hour 30 minutes
- Total Time: 2 hours 35 minutes
- Servings: 12 slices
How to Make Cotton Candy Cake Step by Step
Step 1: Prepare the pans and dry ingredients
Preheat the oven to 350°F.
Grease two 8-inch round cake pans and line the bottoms with parchment paper. Lightly grease the parchment as well.
In a medium bowl, whisk together the flour, baking powder, baking soda, and salt. Set the dry mixture aside.
Step 2: Mix the cake batter
In a large bowl, beat the softened butter, oil, and granulated sugar for 2 to 3 minutes, until pale and fluffy.
Add the eggs one at a time, mixing well after each addition. Scrape down the sides of the bowl as needed.
Mix in the cotton candy emulsion and vanilla extract.
Add the dry ingredients in three additions, alternating with the buttermilk. Begin and end with the dry ingredients, mixing only until combined.
Step 3: Color and bake the cake layers
Divide the batter evenly between two bowls.
Add a small amount of pink gel coloring to one bowl and blue gel coloring to the other. Fold each color into the batter gently.
Pour the pink batter into one prepared pan and the blue batter into the other. Smooth the tops.
Bake for 25 to 30 minutes, or until a toothpick inserted into the center comes out clean or with a few moist crumbs.
Step 4: Cool the cakes
Let the cakes cool in their pans for 10 minutes.
Run a thin knife around the edges, then turn the layers onto wire racks. Remove the parchment paper and allow the cakes to cool completely.
Do not frost warm cake layers. Warm cake can melt the buttercream and cause the layers to slide.
Step 5: Make the buttercream
Beat the softened butter for 2 to 3 minutes, until smooth and creamy.
Add the powdered sugar one cup at a time, mixing on low speed after each addition. Add 3 tablespoons of cream, the cotton candy emulsion, vanilla, and salt.
Beat on medium speed for another 2 minutes. Add more cream, one tablespoon at a time, until the frosting is smooth and spreadable.
Step 6: Fill and frost the cake
Place the blue cake layer on a serving plate or cake board.
Spread about 1 cup of buttercream evenly over the top. Place the pink layer over the frosting.
Cover the top and sides with a thin crumb coat. Refrigerate the cake for 20 minutes, then apply a thicker final layer of buttercream.
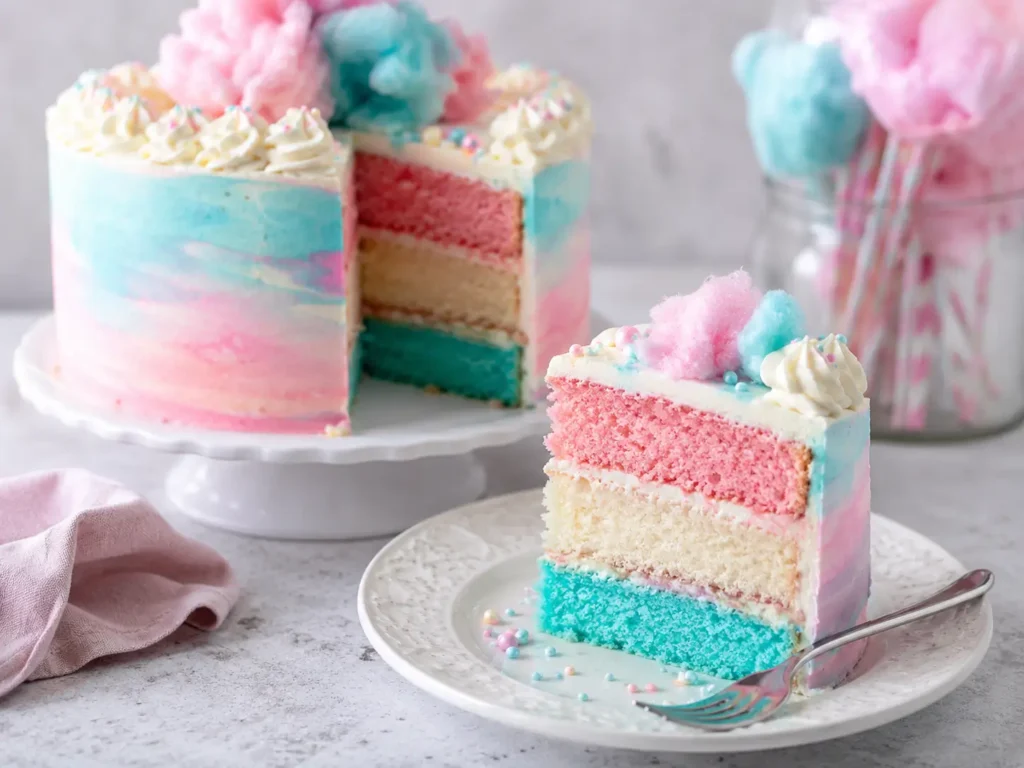
For a swirled finish, divide any remaining frosting into three portions. Leave one white, color one pink, and color the other blue. Apply small amounts around the cake and blend them lightly with an offset spatula.
Step 7: Decorate and serve
Add sprinkles, sanding sugar, edible glitter, or white chocolate curls.
Place fresh cotton candy on top only shortly before serving because it quickly absorbs moisture and begins to dissolve.
Let the decorated cake sit at room temperature for about 20 minutes before slicing. Use a sharp knife and wipe it clean between cuts for neat slices.
Tips for the Best Cotton Candy Cake
Use baking emulsion instead of real cotton candy
Actual cotton candy dissolves as soon as it touches moisture.
Cotton candy baking emulsion provides a more reliable flavor and holds up during baking.
Check the strength of the flavoring
Cotton candy flavorings can vary by brand.
Some concentrated oils require only a few drops, while emulsions can be measured by the teaspoon. Follow the product label if it differs from this recipe.
Use gel food coloring
Gel coloring creates strong pastel shades without adding too much liquid.
Start with a small amount. You can always add more, but it is difficult to lighten batter once too much color has been used.
Measure the flour carefully
Too much flour can make the cake dense or dry.
Spoon the flour into the measuring cup and level the top instead of packing it down.
Use room-temperature ingredients
Butter, eggs, and buttermilk combine more smoothly when they are close to room temperature.
Cold ingredients can cause the batter to look curdled or bake unevenly.
Avoid overmixing
Mix the batter only until the flour disappears.
Overmixing develops too much gluten and may create a tougher cake.
Divide the batter evenly
For layers of equal height, weigh the batter with a kitchen scale or measure it carefully between the two bowls.
Even layers are easier to stack and decorate.
Cool the layers completely
Frosting a warm cake is one of the most common decorating mistakes.
If needed, refrigerate the cooled layers for 20 to 30 minutes before assembling.
Apply a crumb coat
A thin first layer of frosting traps loose cake crumbs.
Chilling the crumb coat before adding the final layer creates a cleaner finish.
Add cotton candy at the last minute
Fresh cotton candy begins shrinking as soon as it contacts frosting or humid air.
Decorate with it immediately before bringing the cake to the table.
Common Mistakes to Avoid
- Do not mix actual cotton candy into the cake batter.
- Avoid using liquid food coloring when you need bright colors.
- Do not overbeat the batter after adding the flour.
- Avoid opening the oven during the first 20 minutes of baking.
- Do not frost the cake until the layers are completely cool.
- Avoid adding too much milk to the buttercream at once.
- Do not store fresh cotton candy on top of the cake overnight.
Variations to Try
Cotton Candy Cupcakes
Divide the colored batter among lined muffin cups.
Bake at 350°F for 17 to 20 minutes. This recipe makes approximately 24 cupcakes.
Three-Layer Cotton Candy Cake
Divide the batter among three 8-inch pans.
Color one layer pink, one blue, and leave one pale or white. Begin checking the cakes after 20 minutes.
Cotton Candy Sheet Cake
Spread the batter into a greased 9-by-13-inch pan.
Swirl the pink and blue portions gently and bake for 30 to 35 minutes.
Funfetti Cotton Candy Cake
Fold 1/2 cup of pastel jimmies into the batter before dividing it.
Avoid nonpareils because their colors may bleed.
Cotton Candy Marshmallow Cake
Spread a thin layer of marshmallow frosting or marshmallow creme between the cake layers.
Keep the filling light so the cake does not slide.
White Chocolate Cotton Candy Cake
Add 1/2 cup of finely chopped white chocolate to the batter.
You can also decorate the cake with white chocolate curls.
Cotton Candy Ice Cream Cake
Bake one cake layer and let it cool.
Top it with softened cotton candy or vanilla ice cream, then freeze until firm.
Purple and Pink Cake
Replace the blue coloring with purple gel coloring.
This combination works well for unicorn or fantasy-themed parties.
Gluten-Free Version
Use a cup-for-cup gluten-free flour blend made for baking.
Check the cake a few minutes early because gluten-free layers may bake at a different rate.
Dairy-Free Version
Use plant-based butter, dairy-free milk mixed with a teaspoon of vinegar, and dairy-free cream for the frosting.
Make sure the cotton candy flavoring is suitable for your needs.
Serving Suggestions
- Serve Cotton Candy Cake with vanilla ice cream, strawberry ice cream, or cotton candy-flavored ice cream.
- It also pairs well with fresh strawberries, raspberries, blueberries, or a simple fruit salad.
- For a carnival-themed dessert table, add popcorn, caramel corn, cupcakes, sugar cookies, cake pops, and colorful candy.
- At a birthday party, serve small slices with milk, lemonade, fruit punch, or vanilla milkshakes.
- You can also decorate the serving plate with pastel sprinkles or small pieces of cotton candy. Keep the cotton candy away from moist fruit or frosting until the cake is ready to serve.
Make-Ahead, Storage, and Reheating
Make-Ahead Cake Layers
The cake layers can be baked up to 2 days ahead.
Let them cool completely, wrap each layer tightly in plastic wrap, and store them at room temperature for one day or in the refrigerator for up to two days.
Chilled layers are often easier to frost because they are firmer.
Make-Ahead Buttercream
The buttercream can be prepared up to 3 days ahead.
Store it in an airtight container in the refrigerator.
Let it soften at room temperature, then beat it briefly before decorating the cake.
Room-Temperature Storage
A fully frosted cake can be stored in a covered cake container at room temperature for up to 1 day, provided the room is cool.
Do not add fresh cotton candy until serving.
Refrigerator Storage
Store leftover cake in an airtight container in the refrigerator for up to 5 days.
Let individual slices sit at room temperature for 20 to 30 minutes before eating. Buttercream and cake have a softer texture when they are not refrigerator-cold.
Freezing Cake Layers
Wrap cooled, unfrosted cake layers tightly in plastic wrap and foil.
Freeze for up to 3 months.
Thaw them overnight in the refrigerator while still wrapped.
Freezing Frosted Cake
Place individual cake slices in the freezer until the frosting becomes firm.
Wrap each slice and place it in a freezer-safe container.
Freeze for up to 2 months and thaw overnight in the refrigerator.
Reheating
This cake does not need reheating.
Serve it at room temperature for the best texture. If a slice is very cold, allow it to rest on the counter rather than warming it in the microwave.
Nutritional Facts
- Calories: 610
- Fat: 29g
- Carbs: 84g
- Protein: 6g
- Sugar: 63g
- Sodium: 310mg
Cotton Candy Cake
Equipment
- Two 8-inch round cake pans
- Parchment paper
- Nonstick baking spray
- Large mixing bowl
- Medium mixing bowl
- Electric hand mixer or stand mixer
- Measuring Cups and Spoons
- Whisk
- Rubber spatula
- Two small bowls
- Wire cooling racks
- Offset spatula or butter knife
- Cake turntable, optional
- Piping bag and large piping tip, optional
Ingredients
For the Cotton Candy Cake
- 2 3/4 cups all-purpose flour
- 2 1/2 teaspoons baking powder
- 1/2 teaspoon baking soda
- 1/2 teaspoon salt
- 3/4 cup unsalted butter softened
- 1/4 cup vegetable or canola oil
- 1 3/4 cups granulated sugar
- 4 large eggs at room temperature
- 2 teaspoons cotton candy baking emulsion or flavoring
- 1 teaspoon vanilla extract
- 1 cup buttermilk at room temperature
- Pink gel food coloring
- Blue gel food coloring
For the Cotton Candy Buttercream
- 1 1/2 cups unsalted butter softened
- 5 cups powdered sugar sifted if lumpy
- 3 to 5 tablespoons heavy cream or whole milk
- 1 teaspoon cotton candy baking emulsion
- 1/2 teaspoon vanilla extract
- 1/4 teaspoon salt
- Pink gel food coloring
- Blue gel food coloring
Optional Decorations
- Pink blue, and white sprinkles
- Edible glitter
- White chocolate curls
- Fresh cotton candy
- Pastel sanding sugar
- Small candy pieces
Instructions
Step 1: Prepare the pans and dry ingredients
- Preheat the oven to 350°F.
- Grease two 8-inch round cake pans and line the bottoms with parchment paper. Lightly grease the parchment as well.
- In a medium bowl, whisk together the flour, baking powder, baking soda, and salt. Set the dry mixture aside.
Step 2: Mix the cake batter
- In a large bowl, beat the softened butter, oil, and granulated sugar for 2 to 3 minutes, until pale and fluffy.
- Add the eggs one at a time, mixing well after each addition. Scrape down the sides of the bowl as needed.
- Mix in the cotton candy emulsion and vanilla extract.
- Add the dry ingredients in three additions, alternating with the buttermilk. Begin and end with the dry ingredients, mixing only until combined.
Step 3: Color and bake the cake layers
- Divide the batter evenly between two bowls.
- Add a small amount of pink gel coloring to one bowl and blue gel coloring to the other. Fold each color into the batter gently.
- Pour the pink batter into one prepared pan and the blue batter into the other. Smooth the tops.
- Bake for 25 to 30 minutes, or until a toothpick inserted into the center comes out clean or with a few moist crumbs.
Step 4: Cool the cakes
- Let the cakes cool in their pans for 10 minutes.
- Run a thin knife around the edges, then turn the layers onto wire racks. Remove the parchment paper and allow the cakes to cool completely.
- Do not frost warm cake layers. Warm cake can melt the buttercream and cause the layers to slide.
Step 5: Make the buttercream
- Beat the softened butter for 2 to 3 minutes, until smooth and creamy.
- Add the powdered sugar one cup at a time, mixing on low speed after each addition. Add 3 tablespoons of cream, the cotton candy emulsion, vanilla, and salt.
- Beat on medium speed for another 2 minutes. Add more cream, one tablespoon at a time, until the frosting is smooth and spreadable.
Step 6: Fill and frost the cake
- Place the blue cake layer on a serving plate or cake board.
- Spread about 1 cup of buttercream evenly over the top. Place the pink layer over the frosting.
- Cover the top and sides with a thin crumb coat. Refrigerate the cake for 20 minutes, then apply a thicker final layer of buttercream.
- For a swirled finish, divide any remaining frosting into three portions. Leave one white, color one pink, and color the other blue. Apply small amounts around the cake and blend them lightly with an offset spatula.
Step 7: Decorate and serve
- Add sprinkles, sanding sugar, edible glitter, or white chocolate curls.
- Place fresh cotton candy on top only shortly before serving because it quickly absorbs moisture and begins to dissolve.
- Let the decorated cake sit at room temperature for about 20 minutes before slicing. Use a sharp knife and wipe it clean between cuts for neat slices.
FAQs
What does Cotton Candy Cake taste like?
It has a sweet vanilla base with a light fruity, carnival-style flavor from cotton candy baking emulsion.
Can I add real cotton candy to the batter?
No. Real cotton candy dissolves quickly when exposed to moisture. Use it only as a decoration immediately before serving.
Can I make the cake one day ahead?
Yes. Assemble and frost the cake one day ahead, then store it covered. Add fresh cotton candy and delicate decorations shortly before serving.
Why did my cake turn dense?
The batter may have been overmixed, too much flour may have been added, or the butter and eggs may have been too cold. Measure carefully and mix only until combined.
Conclusion
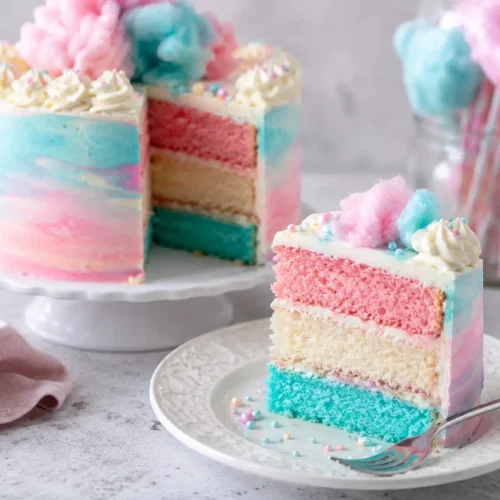
Cotton Candy Cake is a colorful celebration dessert made with soft pink and blue cake layers, cotton candy flavoring, and creamy swirled buttercream. It looks festive while using familiar baking methods that are manageable for beginners.