

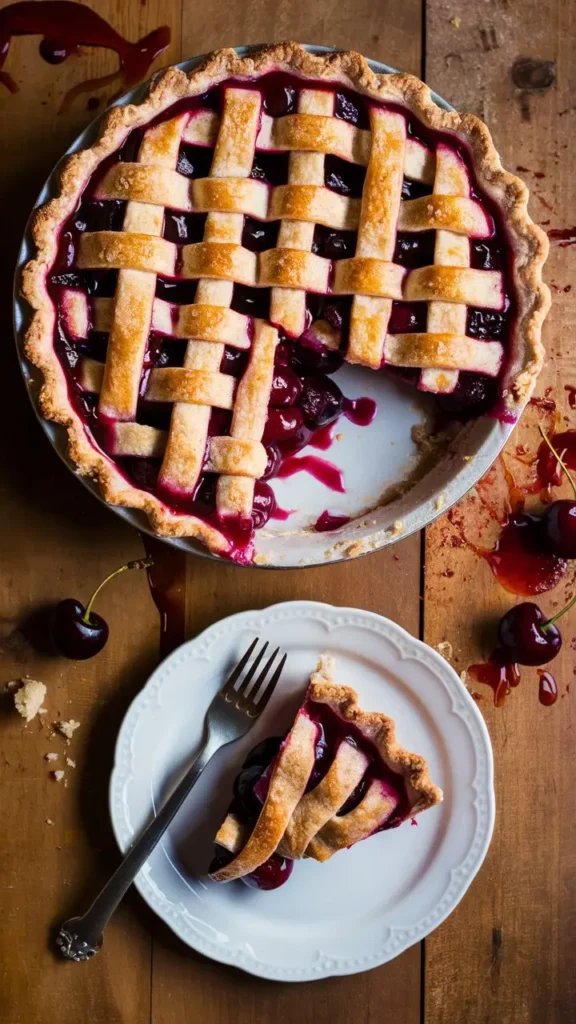
If you’re looking for a dessert that’s both nostalgic and crowd-pleasing, cherry pie is the perfect choice. With its flaky, buttery crust and sweet-tart cherry filling, this all-American dessert has been a favorite at family gatherings, summer barbecues, and holiday dinners for generations.
Why You Will Love This Cherry Pie Recipe
Classic and Timeless Flavor – A blend of sweet and tart that never disappoints.
Homemade Crust – Buttery, flaky, and made with simple ingredients.
Fresh or Frozen Cherries – Works great with either for year-round baking.
Perfect for Any Occasion – Ideal for holidays, summer gatherings, or just because.
Ingredients List
For the Pie Crust (Double Crust):
2½ cups all-purpose flour
1 cup unsalted butter (cold, cubed)
1 tsp salt
1 tsp sugar
6–8 tbsp ice water
For the Cherry Filling:
5 cups fresh or frozen pitted cherries
¾ cup granulated sugar (adjust to taste)
¼ cup cornstasrch
1 tbsp lemon juice
1 tsp vanilla extract
¼ tsp almond extract (optional)
1 tbsp butter (to dot the filling before baking)
For the Pie Topping:
1 egg (for egg wash)
1 tbsp milk or water
1 tbsp coarse sugar (optional, for sprinkling)
Timing & Servings
Prep Time: 30 minutes
Cook Time: 50–60 minutes
Cooling Time: 2–3 hours
Total Time: 3½ hours
Servings: 8 slices
How to Make Cherry Pie from Scratch
Step 1: Prepare the Pie Dough
In a large bowl, mix flour, salt, and sugar. Cut in the cold butter using a pastry cutter or your hands until the mixture resembles coarse crumbs. Slowly add ice water one tablespoon at a time until the dough comes together. Divide the dough into two disks, wrap in plastic, and refrigerate for at least an hour.
Step 2: Make the Cherry Filling
Combine the pitted cherries, sugar, lemon juice, cornstarch, vanilla, and almond extract in a saucepan. Cook over medium heat, stirring constantly, until the mixture thickens—about 10 minutes. Let it cool before using.
Step 3: Roll Out the Dough
On a floured surface, roll out one dough disk into a 12-inch circle. Place it in a 9-inch pie dish, pressing gently into the corners. Trim the edges and chill in the fridge while you work on the lattice top.
Step 4: sAssemble the Pie
Pour the cooled cherry filling into the prepared crust. Dot the top with small pieces of butter.
Step 5: Make a Lattice Top (Optional)
Roll out the second dough disk and cut it into ¾-inch strips. Arrange in a crisscross lattice pattern or cover the pie with a full top crust with slits for venting. Seal and crimp the edges.
Step 6: Apply Egg Wash
Beat the egg with milk or water and brush it over the top crust. Sprinkle with coarse sugar if desired.
Step 7: Bake the Pie
Bake at 400°F (200°C) for 20 minutes. Lower the temperature to 350°F (175°C) and bake for another 30–40 minutes, or until the crust is golden brown and the filling is bubbling.
Step 8: Cool Before Serving
Let the pie cool completely for at least 2 hours before slicing. This helps the filling set properly.
Tips for the Best Cherry Pie
1. Use Cold Butter for the Crust
Cold butter creates steam when baking, leading to a flaky crust. Handle the dough gently to avoid melting the butter too soon.
2. Adjust Sugar Based on Cherries
If you’re using sweet cherries, reduce the sugar slightly. If your cherries are very tart, you might want to increase it a little.
3. Don’t Skip the Lemon Juice
A splash of lemon juice brightens the cherry flavor and balances the sweetness.
4. Bake on a Lower Rack
This helps the bottom crust brown nicely and prevents a soggy bottom.
5. Use a Pie Shield
If the crust starts browning too quickly, cover the edges with foil or a pie crust shield.
Fresh vs. Frozen Cherries
Both work well in this recipe, but here are a few key differences:
Fresh cherries offer the best flavor and texture. Pit them yourself or buy pre-pitted.
Frozen cherries are more convenient and available year-round. Just thaw and drain them well before cooking.
Different Variations of Cherry Pie
1. Mini Cherry Hand Pies
Use the same filling and dough to make smaller, portable versions. Perfect for parties or picnics.
2. Cherry Pie with Crumb Topping
Swap the top crust for a streusel made of flour, sugar, and butter for a bakery-style pie.
3. Cherry-Almond Pie
Add almond flour to the crust or sliced almonds on top for extra nutty flavor.
4. Cherry and Berry Pie
Mix in raspberries, blueberries, or blackberries with the cherries for a summer fruit medley.
How to Store and Reheat Cherry Pie
Storing:
At Room Temperature: Keep the pie loosely covered for up to 2 days.
In the Fridge: Store for up to 4 days in an airtight container.
Reheating:
Reheat slices in the oven at 325°F (160°C) for about 10 minutes to crisp the crust.
You can also warm it in the microwave for 20–30 seconds, but the crust may soften.
Can You Freeze Cherry Pie?
Yes! You can freeze the unbaked assembled pie for up to 3 months. Bake from frozen by adding an additional 15–20 minutes to the baking time. You can also freeze the baked pie and reheat it when needed.
Serving Suggestions for Cherry Pie
With Vanilla Ice Cream – A classic combo that balances the warm filling with cool creaminess.
With Whipped Cream – Light and fluffy topping that complements the richness of the pie.
With a Dusting of Powdered Sugar – For a quick presentation upgrade.
With Lemon Zest – Adds brightness and a modern twist.
Healthier Alternatives
Use a whole wheat crust or almond flour crust for added fiber and nutrition.
Reduce the sugar or use a sugar substitute like stevia or monk fruit sweetener.
Swap cornstarch for arrowroot powder or tapioca for a cleaner thickener.
FAQs
Q1: Can I use canned cherries for cherry pie?
Yes, but use canned cherries packed in water or juice—not pie filling—and drain them well.
Q2: How do I know when the pie is done?
The crust should be golden and the filling bubbling through the vents or lattice.
Q3: Can I make the crust ahead of time?
Absolutely. Prepare the dough up to 2 days ahead or freeze it for later use.
Q4: My filling is runny—what went wrong?
It likely didn’t cook long enough or didn’t cool before slicing. Let it rest to fully set.
Q5: What’s the best pan for cherry pie?
Glass pie dishes allow you to see the bottom crust and ensure it’s baked through.
Conclusion
Cherry pie is more than just a dessert—it’s a beloved tradition, a symbol of American baking, and a celebration of seasonal fruit at its finest. Whether you’re baking it for the first time or for the hundredth, it has a way of bringing joy to any table. With its flaky crust, vibrant cherry filling, and irresistible aroma, this homemade cherry pie is bound to be a hit with your family, friends, and guests. So tie on your apron, preheat your oven, and let this timeless recipe guide you to baking success.