

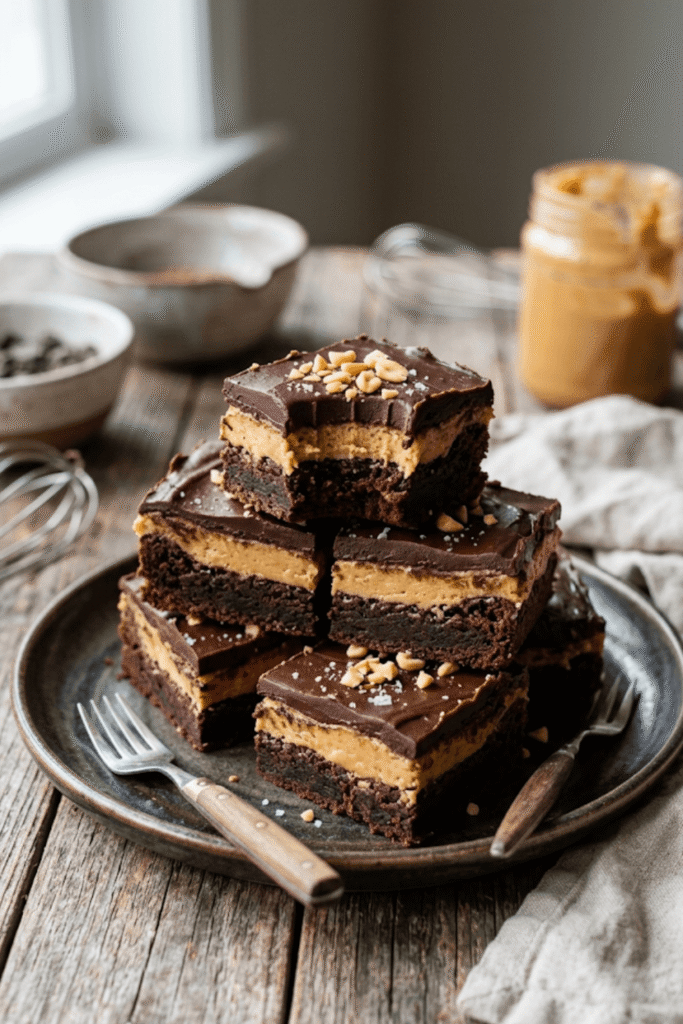
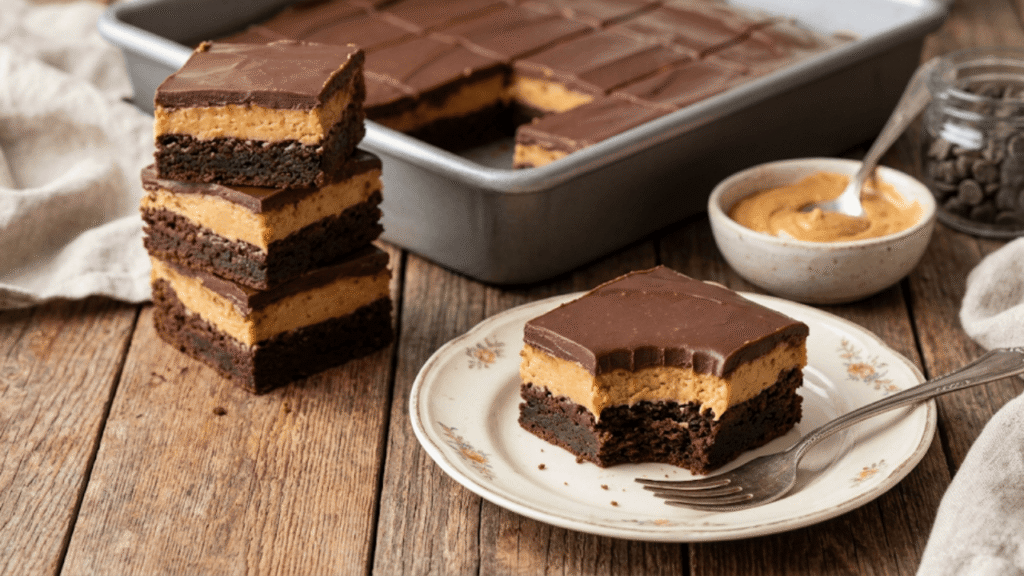
If you love the classic combination of chocolate and peanut butter, buckeye brownies are hard to beat. Inspired by the famous buckeye candy, these brownies take everything you already love—fudgy chocolate base, creamy peanut butter filling, and smooth chocolate topping—and layer it into one irresistible dessert.
Each bite delivers contrast: dense, chewy brownie on the bottom, a sweet and slightly salty peanut butter layer in the middle, and a glossy chocolate topping that ties everything together. It’s indulgent, satisfying, and perfect for anyone who prefers bold, dessert-style flavors.
This recipe focuses on getting the balance just right—rich but not overwhelming, sweet but not cloying, and structured enough to slice cleanly while staying soft and decadent.
Why This Recipe Is Popular / Why You’ll Love It
Buckeye brownies have become a favorite for a reason—they combine two classic desserts into one standout treat.
Three layers of flavor and texture
Perfect chocolate and peanut butter balance
Fudgy, not cakey brownies
Great for parties and gatherings
Make-ahead friendly dessert
If you enjoy bakery-style brownies with a twist, this recipe delivers a reliable, crowd-pleasing result.
Equipment
9×9-inch baking pan
Mixing bowls (2–3)
Hand mixer or whisk
Spatula
Measuring cups and spoons
Parchment paper (optional, for easy removal)
Ingredients
For the Brownie Layer:
½ cup unsalted butter, melted
1 cup granulated sugar
2 large eggs
1 teaspoon vanilla extract
⅓ cup unsweetened cocoa powder
½ cup all-purpose flour
¼ teaspoon salt
¼ teaspoon baking powder
For the Peanut Butter Layer:
1 cup creamy peanut butter
½ cup unsalted butter, softened
1½ cups powdered sugar
1 teaspoon vanilla extract
For the Chocolate Topping:
1 cup semi-sweet chocolate chips
2 tablespoons butter
Timing and Servings
Prep Time: 20 minutes
Cook Time: 25 minutes
Chill Time: 1 hour
Total Time: 1 hour 45 minutes
Servings: 12 squares
Calories per serving: ~350 kcal
How to Make (Step-by-Step Instructions)
Step 1: Prepare the Brownie Batter
Preheat your oven to 175°C (350°F). In a bowl, mix melted butter and sugar until smooth. Add eggs and vanilla, then whisk until glossy.
Step 2: Add Dry Ingredients
Stir in cocoa powder, flour, salt, and baking powder. Mix just until combined—avoid overmixing to keep the brownies fudgy.
Step 3: Bake the Brownie Base
Pour the batter into a lined or greased 9×9-inch pan. Bake for 20–25 minutes. Let the brownies cool completely before adding layers.
Step 4: Make the Peanut Butter Layer
In another bowl, beat peanut butter, softened butter, powdered sugar, and vanilla until smooth and thick. Spread evenly over the cooled brownie base.
Step 5: Prepare the Chocolate Topping
Melt chocolate chips and butter together using a microwave or double boiler. Stir until smooth and glossy.
Step 6: Assemble and Chill
Pour the melted chocolate over the peanut butter layer and spread evenly. Refrigerate for about 1 hour until set. Slice into squares and serve.
Tips for Best Results
Getting clean layers and balanced flavor comes down to a few key details:
Let brownies cool completely before adding peanut butter layer
Use creamy peanut butter for smooth texture
Don’t overbake the brownies – they should remain slightly fudgy
Chill before slicing – helps create clean, neat squares
Use a warm knife for smoother cuts
These small steps make a noticeable difference in the final result.
Variations
Buckeye brownies are flexible and easy to customize:
Dark Chocolate Version
Use dark chocolate chips for a less sweet, more intense flavor.
Crunchy Peanut Butter Layer
Swap creamy peanut butter for crunchy to add texture.
Salted Top
Sprinkle flaky sea salt on top of the chocolate layer for contrast.
Mini Buckeye Bites
Make in a smaller pan and cut into bite-sized squares for parties.
What to Serve With It
These brownies are rich, so pairing them with something simple works best:
A glass of cold milk
Hot coffee or espresso
Vanilla ice cream
Fresh berries for contrast
They’re perfect as a standalone dessert but can also be dressed up for special occasions.
Storage and Reheating
Store in an airtight container in the refrigerator for up to 5 days
Bring to room temperature before serving for best texture
Can be frozen for up to 2 months
No reheating needed
Chilling helps maintain structure, especially in warmer climates.
Common Mistakes to Avoid
Overbaking the brownie layer – leads to dryness
Adding layers too early – causes melting and uneven texture
Using too much powdered sugar – makes peanut layer overly sweet
Skipping chilling time – results in messy slicing
Using low-quality chocolate – affects overall flavor
Precision and patience help you achieve bakery-style results.
Nutritional Facts (Per Serving)
Calories: 350 kcal
Protein: 5 g
Carbs: 32 g
Fat: 22 g
Fiber: 2 g
Sugar: 24 g
Sodium: 180 mg
Cholesterol: 45 mg
Conclusion
Buckeye brownies are the kind of dessert that feels both nostalgic and indulgent. With their rich chocolate base, creamy peanut butter center, and smooth chocolate topping, they offer a perfect balance of flavors and textures in every bite.
This recipe keeps the process simple while focusing on results that look and taste impressive. Whether you’re baking for a gathering or just treating yourself, these brownies are a reliable way to deliver something memorable.
Once you try them, they’re likely to become a regular favorite in your dessert rotation.
FAQs
1. Why are they called buckeye brownies?
They’re inspired by buckeye candies, which feature peanut butter centers coated in chocolate.
2. Can I use a boxed brownie mix?
Yes, you can use a mix for convenience, then add the peanut butter and chocolate layers.
3. Do I need to refrigerate them?
Yes, refrigeration helps the layers set properly and keeps the texture firm.
4. Can I make them ahead of time?
Absolutely. They store well and are perfect for preparing a day in advance.
5. How do I get clean slices?
Chill fully and use a warm, sharp knife for neat cuts.